 |
| Home |
| Assembly Notes |
| More Speed |
| More Power |
| An Accurate Speedometer |
| Relocate Controller |
| 72 Volt Mod. |
| Technical Notes |
| My Repair Record |
| Environmental Issues |
| Michigan Moped Law |
|
|
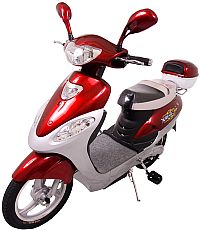
These are notes on the routine repairs I have had to make on my X-Treme XB-500 Electric Bike. Some of the repairs have lengthly explanations to help others who may need to do the same repairs.
1. 08/11/2008 Remove the Drive Chain
The chain connecting the pedal to the idler sprocket on the back wheel can be removed if you have no desire to be able to pedal the bike. I found that I coul not use the pedals without looking like an idiot. They are located too close to the seat, and I don't have sufficient range of motion of my knees to allow me to use them. I never have them attached, so I don't find a need for the chain. Eliminating the chain not only reduces the weight of the bike by a small amount, but it also eliminates a little bit of friction.
The easiest way to remove the chain is to disconnect the removable link. First locate the link. It looks like the photos below.
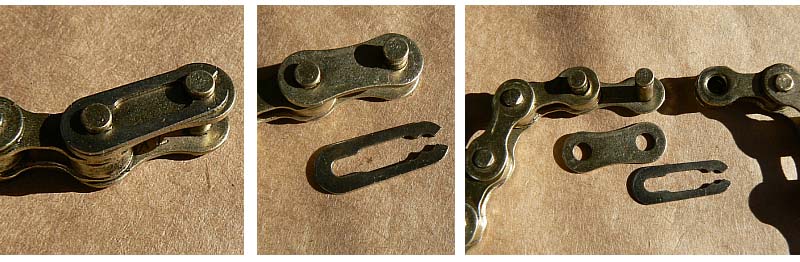
Once you have found it, you can use a pair of plires to work the clip off of the notches on the two link studs. Then remove the outside link bar, and then slide the link out of the holes in the chain. You can now remove the chain from the bike, and you haven't even had to loosen the hub bolts.
2. 09/04/2008 Repair flat tire on rear wheel
Having a flat is no fun on an electric bike. When I had my first one, I thought back to the days when I was 13 years old, and my older brother had a flat on his bicycle as he was taking me home from my grandmother's house. The front tire of his bicycle went flat. The first thing he did was wheel the bike over to a nearby house. He knocked on the door and asked the lady who answered if he could use her garden hose for a few minutes. He then screwed the cap off the bicycle tire valve, turned it around, and used the end of it to unscrew the valve stem from inside the valve. next, he used the garden hose to fill the tire with water. Then he put the valve stem back into the valve, and he rode the bicycle home , with me on the rear luggage carrier. The water in the tire did not escape through the puncture very fast, so we had plenty of time to ride the two miles left on our trip.
When I got my flat, I unfortunately was not very close to a house with a garden hose. I was, however, prepared. I had a small bicycle tire pump under the seat of my bike, and the puncture was quite small, being caused by a common paper staple. So I laid my bike on it's side, and with the bicycle pump, inflated my tire to 50 psi. I then drove quickly home... a distance of almost 3 miles. After 2 miles, I stopped and checked the tire pressure, and again inflated it to 50 psi. (it had dropped to 20 psi).
Arriving at home, I used the following procedure to find the puncture and repair the flat without removing the wheel from the bike.
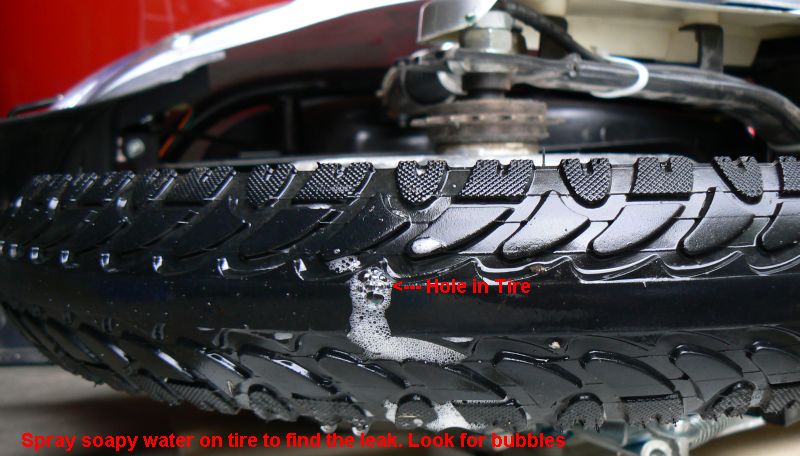
First, inflate the tire to about 50 psi. this will make the leak more detectable. Then with the bike on it's side, spray soapy water onto the tire. When you wet the leak, you will see bubbles forming.
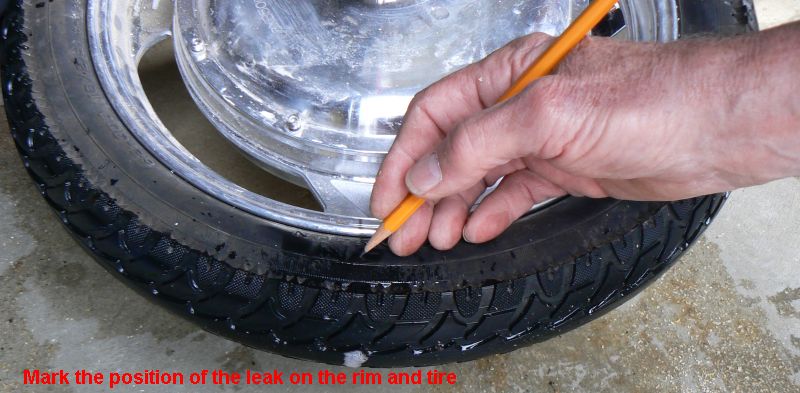
Once you locate the leak, mark the position of the leak on the side of the tire, and on the rim so you can locate the hole in the tube once you gain access to it.
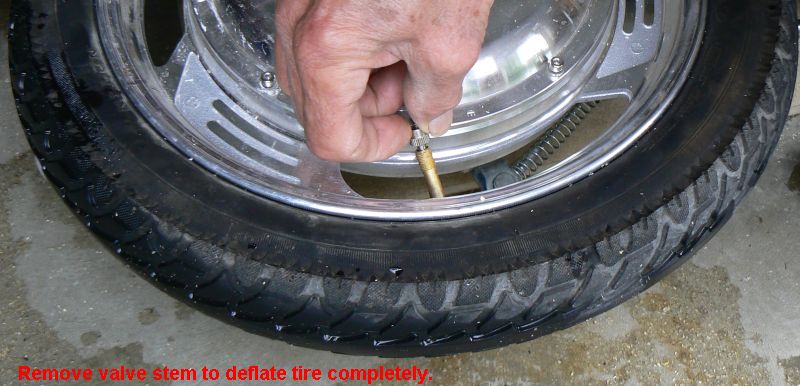
Deflate the tire completely. You can do this by removing the valve stem from the valve, provided you have a tool to do so. You can buy valve caps that have this tool on the top of them from bicycle shops. They aren't very expensive, and having such a cap on one of your tires is an essential part of bicycling.
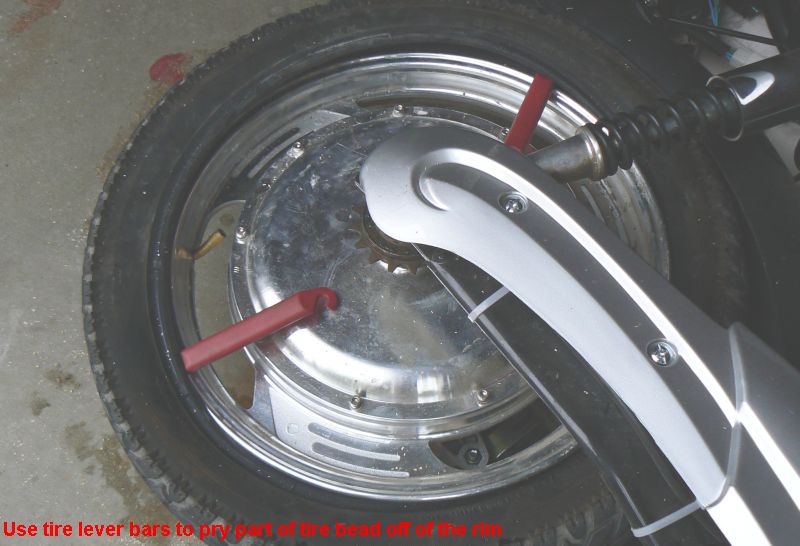
With your tire levers, work part of the tire bead off of the rim. The trick here is to first get the tire bead pushed toward the inside of the rim so that the bead is easier to pull over the edge of the rim.
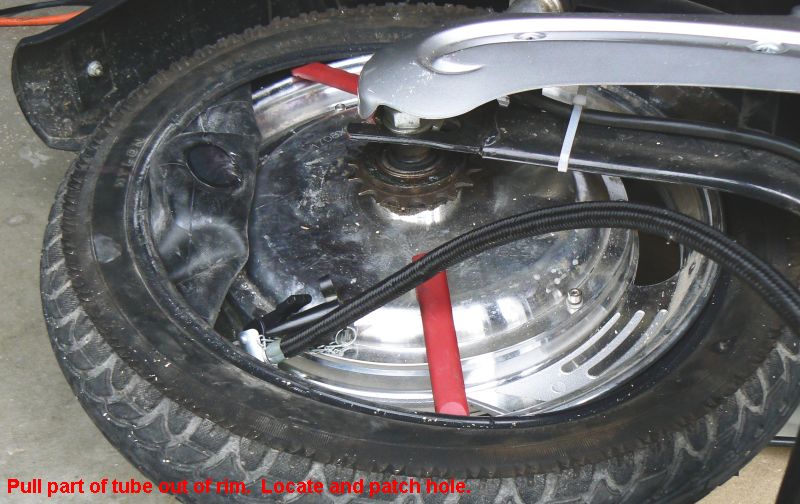
With part of the tire off the rim, you can pull the part of the tube that has the puncture out of the tire. Then use a little pressure from a hand pump to inflate the tube so you can find the actual puncture. Then follow the directions from your tire repair kit to patch the leak.
Before you push the repaired tube back into the tire, cover it with talcum powder to make sure it isn't sticky. This is to make sure that when you inflate the tube, it will expand evenly, and not have wrinkles pinched in it. These can cause more flats. Once you get the tire bead back over the rim edge, inflate the tire to a low pressure, then release the pressure. This also gives the tube a chance to expand evenly inside the tire. Do this two or three times. Then finally, inflate the tire to the recommended 36 psi. That's it! You're back on the road.
3. 09/23/2008 Replace Tail Light
I noticed that my tail light was not operating, and decided to replace it. I was able to get the center bulb out of the taillight assembly, but I was unable to find a replacement bulb locally. I did, however, find that a standard automotive 1157 type bulb would fit in the socket, and would work just fine for my combination tail light/brake light. I could not, however, get the larger bulb back into the assembly, because there was not enough room between the assembly and the bike frame to let me maneuver the bulb through the hole in the taillight. I had to remove the seat, and the plastic body panels on either side of the seat to gain access to the screws that mount the taillight assembly to the bike. This took a bit of time, and the re-assembly was a bit tedious, but I managed to get everything back together and aligned properly. It was a 2.5 hour job to replace one bulb.
4. 09/26/2008 Replace Defective Battery Level Meter
I was on my way to work one day. My battery had been fully charged overnight, and I was only a couple of miles from home, when my battery level meter dropped to zero. I was puzzled, because there was no change in performance. I stopped, turned the ignition off, and checked the battery connector, and all seemed well. I turned the bike back on, and the battery indicator jumped to full again. After another half mile, the battery meter went to zero, and stayed there for the rest of my trip to work. When I got back home that afternoon, I opened the clamshell around the instrument panel, switched on the key, and measured the voltage across the terminals on the back of the battery meter... they measured 47 volts, so I knew that I had a defective meter. (it read zero).
The entire instrument cluster is sold as a single unit by X-Treme for $27.00, so I ordered one, and when it came, I installed the new one on my bike. In doing so, I noticed that there is a potentiomenter on the back of the unit which can be used to calibrate the speedometer. I adjusted mine to read correctly at 15 mph on a flat road. it's still incorrect at other speeds, and under different load conditions, but at least it's a little closer than it was before.
After I replaced the instrument cluster, I decided to open up the old one to see if I could find out why my Battery Meter went bad.
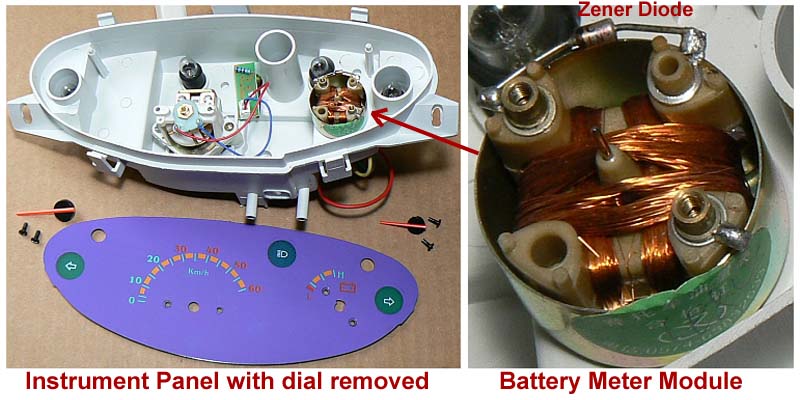 [edited 11/23/08]It turns out that the Battery meter has a 43.2 volt zener diode in series with the meter. The zener will not conduct any current until the voltage across it is at least 43.2 volts. This allows the meter to more accurately indicate the charge level of the battery, since 43.2 volts represents a battery pack which is down to 10.8 volts per battery. Anything above that voltage will begin to register on the meter, and full scale is set to around 49 - 50 volts. The problem with my meter was that the solder joint on one end of the zener diode had broken loose. I re-soldered it in place, and now I have a spare instrument panel.
[11/23/08]To make the battery meter read correctly for a 60 volt setup, you only need to replace the zener diode with one rated at about 54 volts. Then your meter will again read empty when your pack voltage gets down to 10.8 volts/cell, and it will be pegged on the high end when the battery voltage is around 60-61 volts.
5. 10/07/2010 Replace Original Battery Pack
Over the past few weeks, I have been having trouble charging my 48 volt battery pack. I'm running on 72 volts, and have two chargers. A 48 volt charger charges the original four cells, and a 24 volt charger for the two additional cells in the under-seat compartment. The charger never seemed to complete the charge, so I put it on a timer, and only let it run for 3 1/2 hours each time. My battery was charging to around 54 volts each time, so I thought the problem must be the charger. But after buying a new 48 volt charger, I found I was having the same problem. Finally, this afternoon, after having the charger plugged in for 7 hours, and the red light still on, I decided to see if there was one cell that was out of balance.
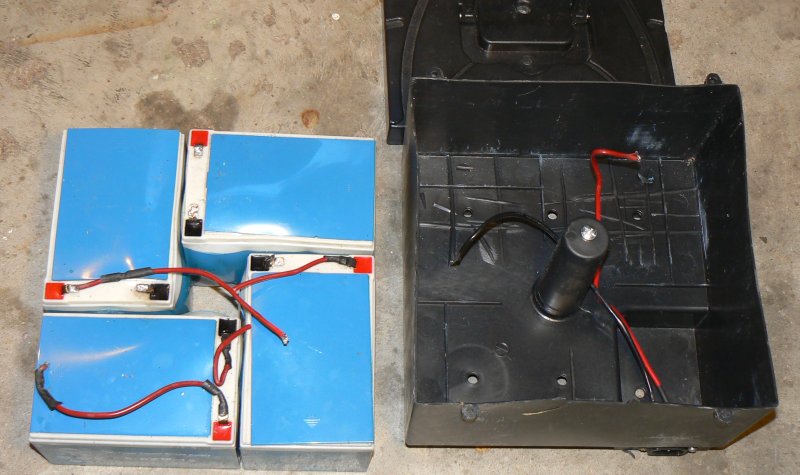
I removed the battery pack from the bike and opened it up. I found all four of my cells bloated to the point they could not be removed from the battery case. After cooling the batteries and pack in my freezer, I was able to get them out of the case. Each battery measured about 12.3 volts, and there was signs of leakage in the bottom of the black shell. I will now go to Auto-Zone and buy four new batteries to take the place of the original cells. At this point, my Odometer reads 1347 miles, so at $32.00 per cell, we're talking right around 10 cents per mile. I think I'm going to have to re-calculate my fuel cost to account for this new expenditure, because at that rate, fuel cost for my scooter is greater than the fuel cost for my Chevy Cobolt, which is less than 8 cents/mile. I certainly hope my next set of batteries gives me a few more miles of service.